Integrate Zapier into your Lovable Application with a single shot prompt
Build a Zapier Webhook Integration Page that enables users to seamlessly send data from your app to Zapier’s automation workflows. Start with a Webhook Form that collects essential user inputs such as name, email, and message, alongside a Zapier Catch Hook URL field for configuration. When users submit the form, it should send a structured JSON payload via POST to Zapier’s webhook endpoint and display a success or error message in real time.
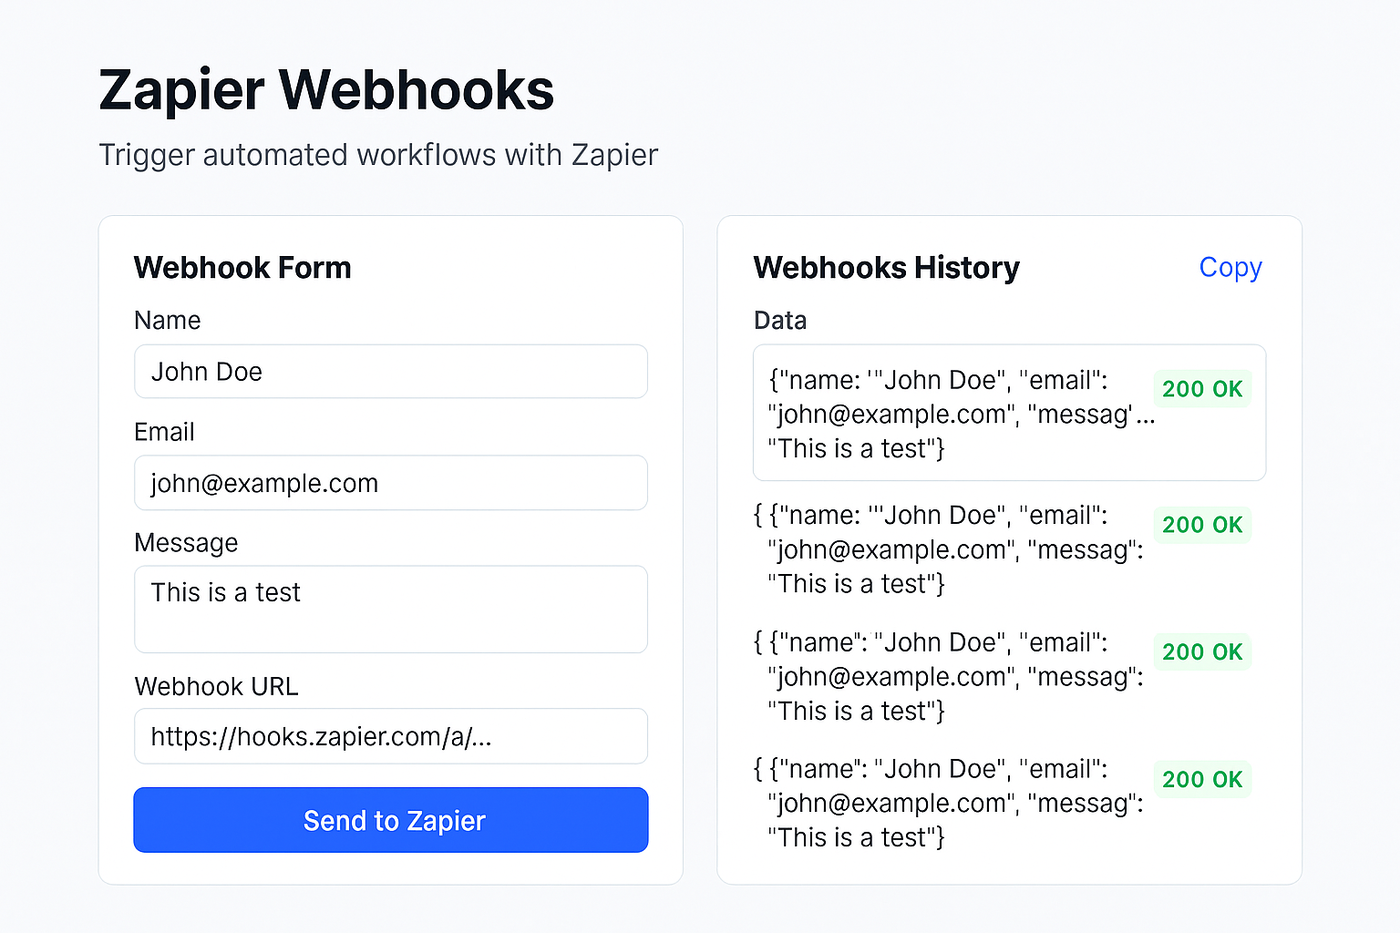
Include configurable test data fields and a button to manually trigger test events, simulating webhook calls to verify Zapier setup before production. Add multiple trigger points throughout the app — such as button clicks, form submissions, or scheduled events — that automatically fire webhooks with defined payload templates.
Below the form, integrate a Webhook History Log to display recent events, showing timestamps, request bodies, and response statuses (200 OK, 400 Bad Request, etc.) with color-coded indicators.
The interface should adopt a modern SaaS dashboard look: white background, minimal Zapier-orange accents, rounded cards, and simple typography. The result is a transparent, developer-friendly control center for managing, testing, and verifying webhook-based Zapier automations in one place.
"Build a Zapier webhook integration page with a form that collects user data and sends it to a Zapier catch hook. Add fields for webhook URL configuration and test data. Create multiple trigger points in the app (button clicks, form submissions, scheduled events) that can fire Zapier webhooks with structured JSON payloads. Include a webhook history log showing sent data and response status."